Connecting DNN and SharePoint 2010
How to connect a DNN site with a SharePoint 2010 site. Once this is completed files can be synchronized from SharePoint 2010 to DNN. This task can be performed by SharePoint Collection Administrators.
Prerequisite. The DNN Connector must be installed on the SharePoint server (See "Installing the DNN Connector (SharePoint 2010)") and then activated on the SharePoint site (See "Activating the DNN Connector").
- Go to the DNN site.
- Navigate to > Advanced Settings >
 SharePoint Connector.
- At SharePoint Synchronization Address, copy the address.
- At DotNetNuke Synchronization Token, select from the following options:
- Token: Select to connect SharePoint to a specific site.
- Server Token: Select to connect SharePoint with all DNN sites on this server.

- Go to the SharePoint site.
- Navigate to Actions > Settings.
- Go to the DotNetNuke section and click the DotNetNuke Connector link.
- Click on the Settings menu and then select Add Connection.
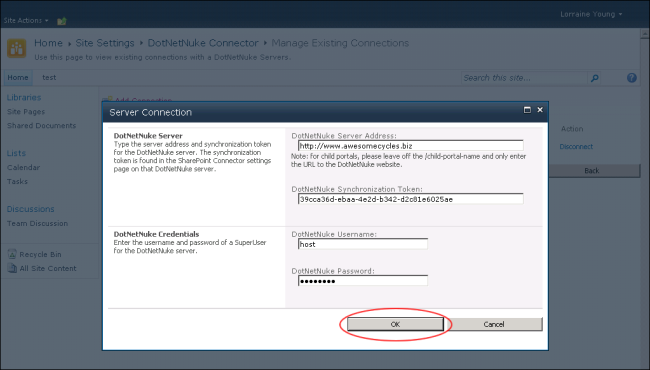
- On the Server Connection page, go to the DNN Server section.
- In the DotNetNuke Server Address text box, enter the DNN Synchronization Address.
-
In the DotNetNuke Synchronization Token text box, enter either the site token or the server token.
- Go to the DotNetNuke Credentials section.
- In the DotNetNuke Username text box, enter the username of a for the DNN server.
- In the DotNetNuke Password text box, enter the password of a for the DNN server.
- Click the OK button to confirm.
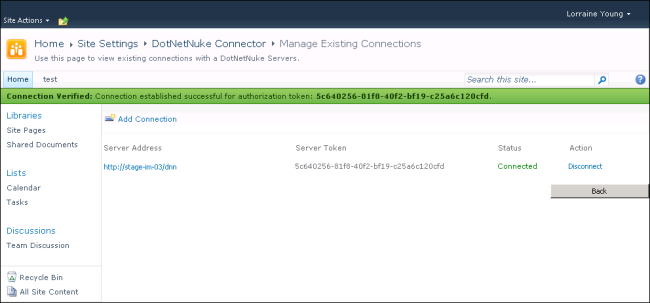
- The details of this connection are now displayed on the Settings > DotNetNuke Connector > Manage Existing Connections page of the SharePoint site.
Open topic with navigation